How To Create An Import Process With Images
| Languages: |
ContentsTemplateThis sub-template doesn't display properly when not included. Please see Template:Languages for the complete version. UsageThis template is designed to simplify Template:Languages, by allowing a simpler syntax for adding new languages. Each language is included by calling this template with the following parameters:
This template should not be used anywhere except in the Languages template. </noinclude> | Translate this article... |
Objective
The objective of this article is to show you how to make a massive image importation process. Specificilly, we are going to import product images.
Execution Steps
We are going to create a custom importation process, using the Initial Data Load for Java module. We are going to use the java class SampleProductsProcess, included in this module... For that we will use the java class SampleProductsProcess.java as the base that is included in the Initial Data Load Module for Java, and through a series of single modifications we will include a new column within the import .csv that will allow us to specify the path of the image that is associated to the product.
Installing Required Modules
- Activate the Professional subscription License.
- Go to General Setup -> Application -> Module Management -> Add Modules
- Search and install the following modules.
Preparing SampleProductsProcess.java
The following modifications need to be made:
- getEntityName method: We will simply return the name of our new entity.
- <source lang="java">public String getEntityName() { return "Simple Products With Image"; } </source>
- getParameters method : We add a new parameter to localize our image.
- <source lang="java"> .... new Parameter("ImageLocation", Parameter.STRING) }; .... </source>
- validateProcess method: We add a validator for our new field (for example: for the maximum length)
- <source lang="java"> .... validator.checkString(values[21], 255); .... </source>
- internalProcess method: We have to pass a parameter to the createProduct() method.
- <source lang="java">public BaseOBObject internalProcess(Object... values) throws Exception { return createProduct((String) values[0], (String) values[1], (String) values[2], (String) values[3], (String) values[4], (String) values[5], (String) values[6], (String) values[7], (String) values[8], (String) values[9], (String) values[10], (String) values[11], (String) values[12], (String) values[13], (String) values[14], (String) values[15], (String) values[16], (String) values[17], (String) values[18], (String) values[19], (String) values[20], (String) values[21]); } </source>
- createProduct method: Additionally to receiving a new parameter (imagelocation), this method does contain the logic to import the image to the database from its physical location.
- <source lang="java"> .... File imageFile = new File(imagelocation); if (imageFile.exists()) { FileInputStream is = new FileInputStream(imageFile); long length = imageFile.length(); byte[] bytes = new byte[(int) length]; int offset = 0; int numRead = 0; while (offset < bytes.length && (numRead = is.read(bytes, offset, bytes.length - offset)) >= 0) { offset += numRead; } is.close(); ByteArrayInputStream bis = new ByteArrayInputStream(bytes); BufferedImage rImage = ImageIO.read(bis); Image productImage = OBProvider.getInstance().get(Image.class); productImage.setName(imageFile.getName()); productImage.setBindaryData(bytes); productImage.setWidth(new Long(rImage.getWidth())); productImage.setHeight(new Long(rImage.getHeight())); productImage.setMimetype(tika.detect(bytes)); OBDal.getInstance().save(productImage); OBDal.getInstance().flush(); product.setImage(productImage); } .... </source>
Registering the Process
|
Importing the Data
|
The .csv file that contains the data, must include the new column we have added, with the string "ImageLocation" in the header. |
Pay special attention on the class name while adding the entity default value.
|
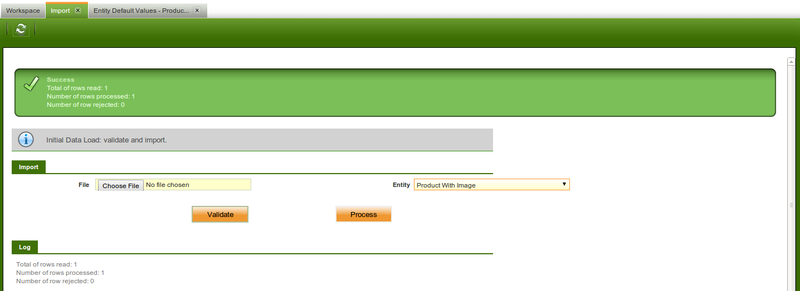
- Validate the input file. If the file has invalid data, it will show the invalid data in the log.Screen
- Once the input values are validated, the data can be loaded into the actual table by clicking on the process.
- If there are any issues while processing the input data, appropriate messages will be logged in the message box provided under the Log header in the import screen.
Result
As the result, we have the product imported with its corresponding product image.


