How to Migrate 2.50 Modules to 3.0
Contents
Overview
This document explains how module developers can migrate their modules to make them compatible with Openbravo 3.0
When to Migrate
Any module version should declare a dependency -direct or indirect- to the core module. It defines the Openbravo Release (2.50, 3.0) that the module version is compatible with. A module version can be compatible with different Openbravo Releases if the dependencies it declares allow to install it on top of different major version of the core module. Before September 2010 all versions of all Openbravo modules were compatible only with Openbravo 2.50 since it was the only core major version that supported modularity. Then the first Release Candidate of Openbravo 3.0 was published. This document explains what are the steps a developer needs to do to migrate the modules he has published to make them compatible with Openbravo 3.0. The main concept behind this migration is the "extension of dependencies": the dependency of module version A v1 on other module version B v2 can be extended by declaring the Last Version of module B (v3) that satisfies as well the dependency. This way the dependency is on the range of module versions between v2 and v3.
As stated above, the compatibility with Openbravo 2.50 or 3.0 depends on the dependencies declared by the module version. There are several different cases to take into account:
- The module only declares a direct dependency to core, and there is no dependencies to other not compatible modules.
- If the module only declares direct dependencies to core with dependency enforcement set to None then that module version is already compatible with Openbravo 3.0, so the developer should test that the module installs and works properly on a 3.0 instance. In case it doesn't the developer should cancel that module version to avoid this module to be installed. In general modules should not use this type of dependency enforcement
- For other dependency enforcements (default one is Major), it will be necessary to release a new version extending dependencies. See Simplified Approach for a step by step description.
- The module depends on other module versions that are not compatible with Openbravo 3.0. In this case it is necessary to wait till the other modules are made 3.0 compatible. Regarding how the other modules were made compatible there are two possible cases:
- If the dependent modules release a new minor version compatible with 3.0, no change is required because that minor version would still satisfy the dependency of the module, so the module will become 3.0 compatible without any change. It is still recommended to test the module on a 3.0 instance to verify everything works fine.
- In case dependent modules release new major versions compatible with 3.0, it will be required to extend the module dependencies to make them compatible with these new versions and release a new version. See Simplified Approach to do this.
- A mixture of both cases described above: module depends directly on core and on other 2.50 modules. It will be necessary to extend dependency to core and to other modules as stated previously.
For any of the cases that require of extending dependencies it is needed to release a new version of the module, this can be done following any of the approaches detailed below.
Simplified Approach
As 3.0 API is mainly the same as 2.50 one, most 2.50 modules are compatible with 3.0. This simplified approach consists in extending dependencies of the module assuming it will be compatible with 3.0, publishing it in test mode and test it (install and use) in a 3.0 instance. Finally, after succesful testing, make it available to everyone.
In summary the steps are:
- Extend dependencies
- Publish new version in test mode
- Test in a 3.0 instance and make it general available
Each of these steps is detailed below.
Extend Dependencies
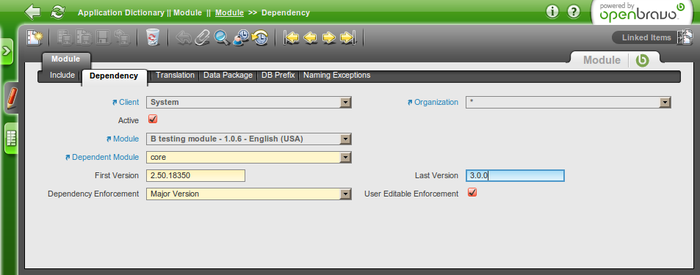
In a 2.50 development environment with your modules installed on, extend dependencies of them by setting the Last Version field to 3.0.0 in the case of dependencies to core, or to the 3.0 compatible version of the module in the case of other dependencies.
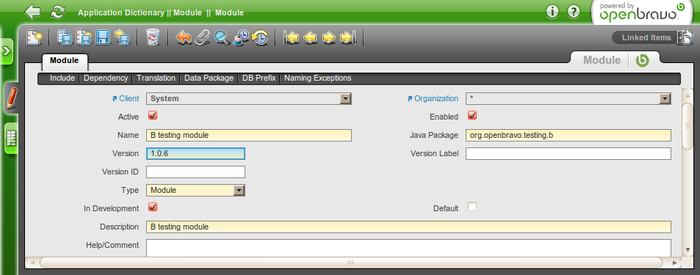
Note that for Major dependency enforcement it is not needed to add the Last Version in case the 3.0 compatible version is within the same major version as the First Version. So for example, if your module A depends on B from version 1.0.5 (which is only compatible with 2.50) and a new 1.0.6 minor version of B is released, it is not necessary to change A's dependency as it will be automatically be compatible with B 1.0.6. Also for direct dependencies to core minor version is not taken into account, so the Last Version field could be any 3.0.x (for example 3.0.0).
Publish New Version
In the same 2.50 development environment, prepare, release and publish a new version of your module with these changes in the dependencies.
It is preferable to publish a new minor version, so other modules depending on yours will still be compatible with this new version. For example, if your original module B 1.0.5 was only compatible with core 2.50, the suggested new version for the new B compatible with 3.0 would be 1.0.6 (or any other 1.0.x higher than 1.0.5). In this way, if it exists any other module A which depends on B 1.0.x it won't be required for A to extend B dependency because it is already compatible with the new one.
The steps to follow are:
- Change your module version to a higher one following the recommendations stated above.
- Export your new module version to xml files.
- Package the new obx.
- Publish the obx in Central Repository with Test maturity status.
Test
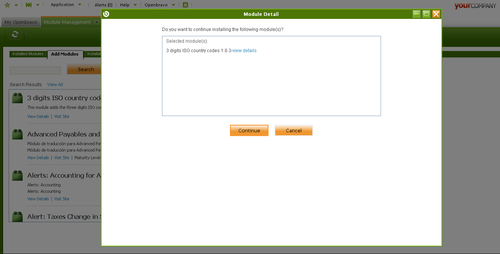
Now you will be able to install your module in a 3.0 instance. For example, you can use a 3.0 virtual appliance to look in Central Repository for the new version and install it. Do not forget to configure your instance to accept module versions in Test maturity status.
Once it is installed you can do all testings you need to ensure it works correctly.
When everything is fine you can promote the new module version to Control Release or General Available maturity status to make it available to every one.
Standard Approach
This is the standard way of extending dependencies of modules, it is valid not only for core but for any new major version of a dependent module, though, as example, it is explained for dependencies to core.
It consists on upgrading core with the modules installed, test them, extend dependencies and publish.
In short, the steps to migrate a 2.50 module to 3.0 are the following ones:
- Install the module in a 2.50 instance and upgrade this instance to 3.0.
- Verify everything still works and fix any eventual problem.
- Extend the module dependencies to 3.0.
- Repackage the module and publish a new version.
The following sections explain more in detail each of the steps.
Upgrade to 3.0
In a Openbravo ERP 2.50 instance install the module(s) you want to make 3.0 compatible.
As the dependencies of these modules should be to 2.50, it will not be possible to directly upgrade the instance. To do so it is required to locally relax dependencies on core and on all modules that depend on core 2.50 (unless they are Enforcement None dependencies). This can be done by setting the User Editable Enforcement field in the Dependencies tab and using the Enforcement None in the Settings tab. In this way the module will not prevent upgrade to 3.0. More detailed information about this, can be found in the Modules Management document. These settings are available from 2.50MP21. Note that after this process the User Editable Enforcement can be restored again if wanted.
After this, you will be able to upgrade your instance to 3.0. Direct upgrade from Module Manager Console is supported from 2.50MP23, instances in earlier release can upgrade through obx file.
Verify 3.0 Compatibility
3.0 is based on 2.50 so most modules should work without any additional modification. Anyway, when extending dependencies, it should always be checked everything still works as expected paying special attention to the API changes that could have occur since last verification and might affect your module.
Extend Dependencies
Once every thing works nice, you can extend the core dependency of you module to 3.0.
Note that in case you module has dependencies to other modules that depend on 2.50 you should also change the dependencies to them to be to the version that supports 3.0.
Dependency extension can be done in two ways:
- Making it compatible with core 2.50 and 3.0. In this way you will not force people using the new version of your module to upgrade to 3.0. On the other hand you should test in both 2.50 and 3.0 new versions of your module continue working. To do this you can use a Major Enforcement dependency being the First Version a 2.50.x version and the To version 3.0.y note that y minor version will not be taken into account. This is the preferred way in case your module didn't require of any modification to be 3.0 compatible.
- Making it only 3.0 compatible. Users of you module will have to upgrade to 3.0 in order to be able to install your new version.
Repackage and Publish
Finally you will have to create a new version of your module, package the obx file and publish it as usual.
If the new version is compatible with 2.50 and 3.0, it is advisable to create a new minor version of the module. In this way modules that depend on it (Major Enforcement) will not need to release a new version to be compatible with yours.
Known issues
API changes
As stated above the technical API of Openbravo remains mostly stable from 2.50 to 3.0, although there have been some low risk API changes in the 2.50 and 3.0 life cycle. Check the list if you find some issue when testing your module on Openbravo 3.0
Financial flows
In 3.0 the financial flows have been refactored using the Advanced Payables and Receivables module. It means that the following entities have been replaced:
- C_CashBook
- C_Cash
- C_CashLine
- C_Bank
- C_BankAccount
- C_BankStatement
- C_BankStatementLine
- C_Settlement
- C_Debt_Payment
- C_DP_Management
- C_Remittance
- C_Remittanceline
If your module makes use of some of these entities you should check the Advanced Payables and Receivables documentation for a proper semantic mapping to the new entities.
Alert Management
As of Openbravo 3 RC6 the alert management window has been redesigned. As part of this project the alert Status management has been improved. If your module is managing the alerts it should adapted. The column isFixed has been deprecated and replaced by the new Status column. The background process doesn't set the fixed alerts as deactivated neither. New statuses supported by default are:
- New: Default initial status when the background process finds a new alert. Only alerts on this status are considered on the alert counter.
- Acknowledge: The user has done the necessary actions to solve the issue and is waiting for the background process to set the alert as solved.
- Suppressed: or exceptions. Alerts on this are not expected to be solved on the short-mid term.
- Solved: This is the final status of the alerts. The background process moves them to this status when detects the cause of the alert is fixed.
Other modules can add new statuses if needed.
Cleanup Project
During the 3.0 development cycle the Cleanup Project did remove several deprecated elements from the Openbravo codebase. If your module is affected by this it might need some updates. Check Cleanup Project wiki page contains a description of the changes done.
Library Update
During the 3.0 development cycle the most third party libraries used by Openbravo have been updated to newer version. The project page for this Library Update projects explains a few known issues for which every modules must be checked, so verify if it is affected or not.
Required changes
Here are listed the most common cases requiring modifications. Note that there are some other and stranger cases covered within in this Appendix.
AD windows
Application Dictionary windows will automatically be shown in the new Openbravo 3 mode, unless they use an unsupported feature or they require some changes to be able to work in the new way.
Tab whereclauses, orderbyclauses and filterclauses
In Openbravo, tabs can define whereclauses and filterclauses, which allow tabs to show only some of the records contained in a table, and orderbyclauses, which allow the developer to define a specific order in which the records should be shown.
In Openbravo 3, windows use the Data Access Layer in the backend component to retrieve data. As you might know, the Data Access Layer uses the Hibernate HQL language instead of SQL, and because of that, the old whereclauses, filterclauses, and orderbyclauses, which were written in SQL, cannot be used.
Therefore, if any tab in your module has a defined whereclause, filterclause, or orderbyclause, you need to define a corresponding hqlwhereclause, hqlfilterclause, or hqlorderbyclause, so that Openbravo can show it as an Openbravo 3 window.
If a window in your module contains a tab with a whereclause, filterclause, or orderbyclause, and without its corresponding hqlwhereclause, hqlfilterclause, or hqlorderbyclause, the window will work, but in classic mode, and you will not be able to benefit from all the new features of the Openbravo 3 windows.
You can take a look at how hql clauses are defined in Openbravo Core windows to see how you should define your own.
Application Dictionary Column default values
There is a small but important change of behaviour in Openbravo 3 windows, regarding default values. In Openbravo 2.50, Application Dictionary columns have a default expression which is executed if there is a field for that column in the tab. If there is no field, however, that expression will just be ignored.
In Openbravo 3, however, this is not the case. If the default expression is a "simple one" (that is, if it's not a complex SQL expression like "@SQL=SELECT COALESCE(MAX(SeqNo),0)+10 AS DefaultValue FROM AD_Column WHERE AD_Table_ID=@AD_Table_ID@"), the expression will be executed when the record is saved, if there is no field for the column. If there is a field for the column, the behaviour will be the same as in 2.50.
In a related note, as was previously mentioned, Openbravo 3 windows use the Data Access Layer to do operations in the database, and therefore, database physical default expressions will be ignored.
Manual code changes
Previous considerations
There are new functions that should be used when needed:
- getFrame('main') returns the main html containing all the frameset
- getFrame('frameMenu') returns the menu frame
- getFrame('appFrame') returns the application frame (the form or the grid frame)
This functions call be invoked from any window/popup of Openbravo independently of the frame deep.
Javascript structures like top.whatever should be changed by the proper one using the new getFrame() function (top.whatever moves to getFrame('main').whatever in most cases)
Javascript structures like something(optional).opener.top.whatever should be changed by the proper one using the new getFrame() function (something(optional).opener.top.whatever moves to getFrame('main').whatever in most cases)
Multiple-browser support style changes (optional)
A lot of changes have been developed in core in order to proper visualization of Openbravo ERP 2.50 in Chrome, Safari and Opera. The only change required in manual code is related to the proper visualization of the MessageBox (without it the messagebox of the affected html will display ugly in the mentioned browsers): These changes affects to modules with manual windows and a MessageBox inside them.
The change is: This structure
<source lang="html4strict">
<tbody>| </source>
should be changed by this structure <source lang="html4strict"> <tbody>
|


