Modularity Concepts
Contents
- 1 Overview
- 2 Before you start
- 3 Introduction to the process of developing a Module
- 4 Register a Module
- 5 Development of Module artifacts
- 6 Publish the .obx file of a Module
- 7 Advanced concepts
- 8 Example on how to create and package your module
Overview
Openbravo 2.50 came with the new concept of Modularity: the ability for developers to build, package and distribute Extension Modules and for users to install, uninstall and update Extension Modules.
An Extension Module is a piece of additional functionality that can be deployed optionally and independently on top of Openbravo ERP. Examples of modules are: additional reports, additional windows, connectors, content packs (translations, chart of accounts, list of tax codes, product categories, etc).
The objectives of modularity are:
- Making it easier to contribute to Openbravo ERP by allowing distributed and decoupled development and maintenance of optional features.
- Providing the Community with a rich set of extensions to meet their unique business requirements without bloating the core product.
- Shorten the implementation cycles by enabling system integrators to develop micro-vertical templates.
This document contains an overview of the process of developing Openbravo ERP Modules.
Before you start
Configure your instance
Please review the Development Stack Setup documentation before going ahead.
Concepts
Before you start it's also required to understand some new concepts. These concepts are described in detail in following sections in this document.
Types of Extension Modules
There are three types of Extension Modules:
- Modules: Base content container. Within a Module you can include all types of artifacts but Configuration Scripts: Application Dictionary components, Software resources and Reference data. Modules are the way to add new elements to Openbravo ERP. In a Module you cannot modify elements of other modules -including core-. The reason of that is to avoid crossed dependencies between them.
- Packs: a Pack is a collection of modules and no more. They are intended to simplify deployment and to encourage fine grained modules. Special packs are localization and verticalization packs.
- Templates: a combination of a Pack and a configuration script that is able to modify the behavior of AD components in Modules included in the Pack.
The three of them are generically referred as Modules.
Artifacts in an Extension Module
There are four types of artifacts that can be included in an Extension Module:
- Application Dictionary components: Metadata that describe Openbravo ERP such as Windows, Tabs, Fields, Messages, etc.
- Software Resources: Openbravo ERP components not expressed as metadata such as xml definition of database schema objects, java classes, jar libraries, XML files, etc.
- Reference Data: Business information referred by transactions and that tend not to change frequently such as Charts of accounts, tax codes, banks, product categories, etc. They can be defined at system, client or organization level.
- Configuration Script: Changes in Application Dictionary Components applied to other modules to support a specific set of business processes, such as Hide / show tabs or fields, replace standard processes, etc. Only meaningful changes are allowed.
Openbravo platform itself can not be modified through modules. In particular you are not allowed to modify wad (src-wad code) in a module. It should not be a limitation since the platform is designed to be extensible.
Packaging and .obx files
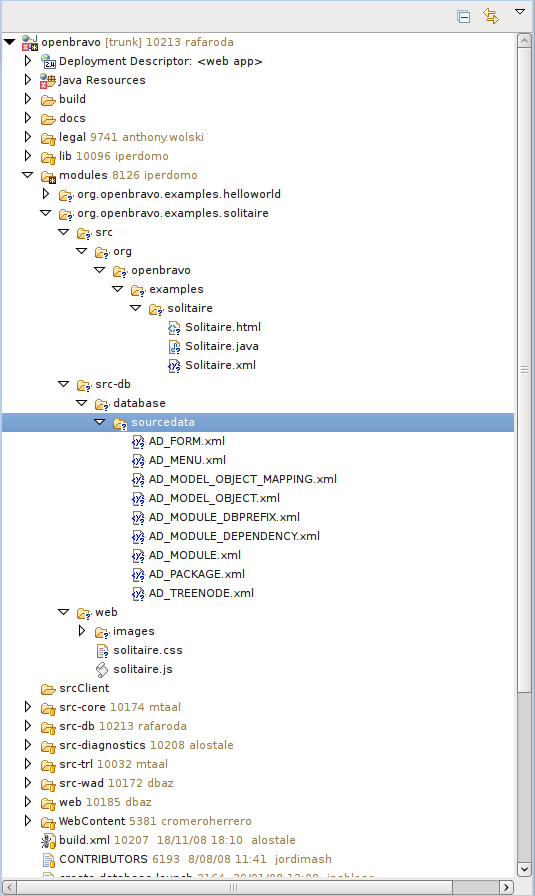
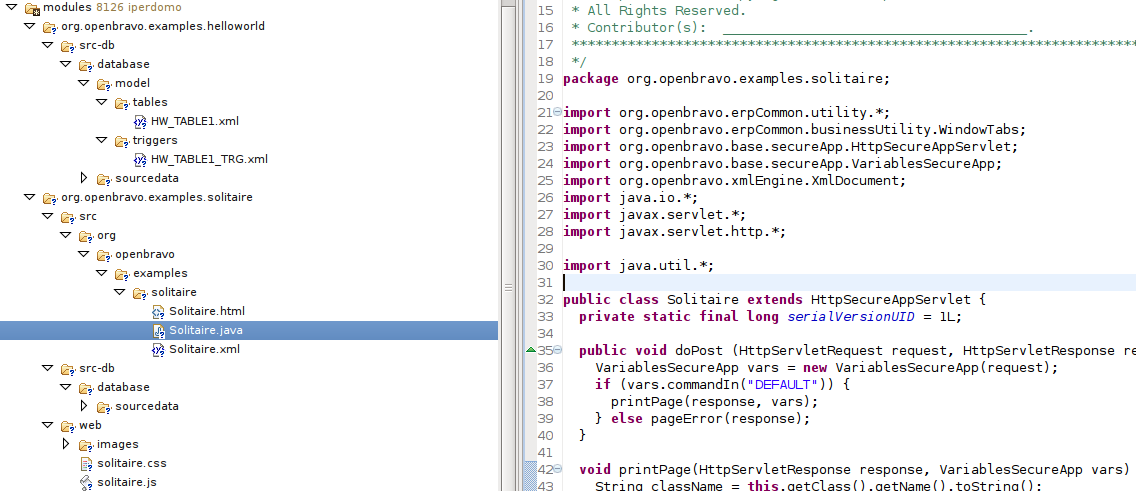
All the content of a module -code, utility files, data- is contained in a separate folder for each module. All the content in that folder is related to and only related to that module. There is a folder within the main Openbravo folder called modules where all the modules that you have installed or developed are located. For each module there is a folder identified by the java package of the module. In that folder the source code structure of openbravo (config, src, src-db, lib, etc.) is replicated as required to store the content of the module.
Modules are distributed as .obx files which are compressed files of the module folder. You can directly decompress it using a zip tool to browse its content.
Module Management Console (MMC)
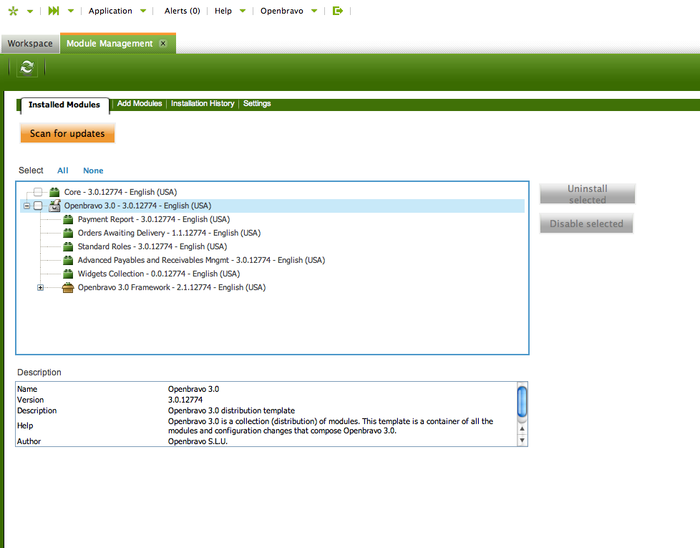
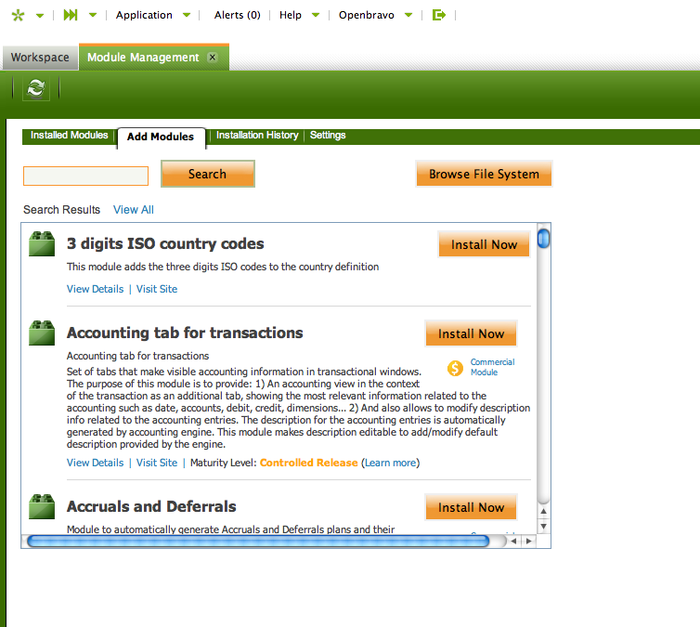
This is a window in Openbravo ERP where System administrators can see installed Extension modules in their instances, and where they can install new ones and uninstall or update the ones that are already installed.
You can find more detailed information about how to operate MMC in the Modules Management document
Central Repository
The Central Repository is a system embedded in the Openbravo Forge to provide services related to Openbravo ERP Modules for developers and users. Detailed description about Central Repository can be found in Publishing Modules document.
Introduction to the process of developing a Module
The process of developing a Module has three main steps:
- Register your Module in the Application Dictionary and in the Central Repository.
- Develop the artifacts included in your Module. Depending on the functional specification and technical design of your module it might include only one type of artifacts or a combination of them. In following sections each type of artifact is described in detail.
- Package your module into an .obx file, and publish it in the Central Repository.
Steps 1 and 3 are common to all types of modules and straightforward. Step 2 depends on the requirements of your module. It has not significantly changed from the way you have developed Openbravo ERP code in previous releases to 2.50 but a few details that you need to know and that are described throughout later in this document. In particular the development tasks (create/update the database, build and compile the system, etc.) have been lightly modified to fit the Modularity paradigm.
Be aware that from now on every piece of Openbravo ERP code belongs to a module (you can see for example that the Openbravo distribution in fact includes several modules, and one of them is "Core"). You should do all your new developments through modules, including your customizations. Still you can do changes directly in other modules -including Openbravo ERP core- but it is highly recommended not to do that. Maintenance will be dramatically better if you keep your changes isolated by doing them through modules, as you can update individual modules without doing any changes to other ones (so for example you can update the Openbravo distribution modules, without doing any changes to your modules).
Following sections will describe each step in detail.
Register a Module
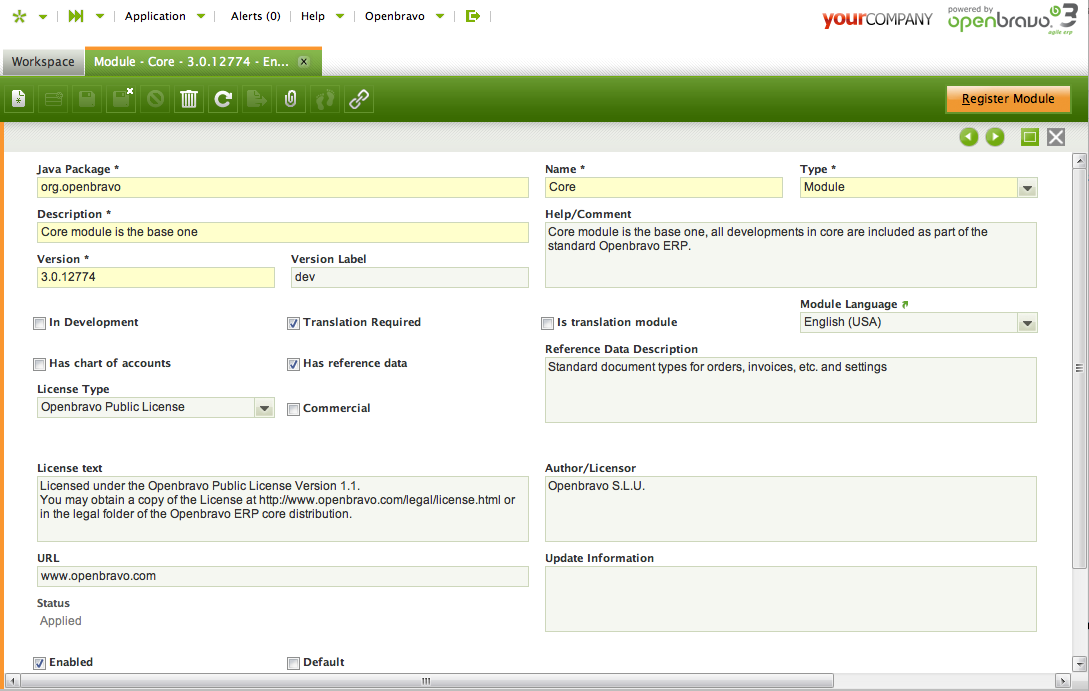
The first thing you have to do is to create a new Module entry in the Module Window within the Application Dictionary menu folder.
There are some details that you need to be aware of:
- Each module has its own native (base) language. In following sections the translation process is described, by now just choose the language you prefer to develop the UI of your module. Of course if you choose English it will be easier to disseminate (eg. to find people to translate it to other languages).
- Name, description and help are the properties used to explain in the Central Repository what your module is. Write them in natural style using the native language you have chosen.
- The Version Number is composed by three numbers separated by two dots to match the Openbravo template for version numbers. In this field you need to have the current version you are working on (there might be multiple versions of your module). Later in this document Version Numbers are explained in detail.
- The java package is a unique identifier of your module and has to match the Java packaging names rules as described in the Java spec. (names and package names). You need to carefully set this value because you are not allowed to change it once your module is registered in the Central Repository. If your module includes java files they have to be packaged within your module java package or in subpackages within it. Examples of java packages for a module are com.yourcompany.yourPackage, org.yourfoundation.yourPackage.yourSubpackage, etc. You will notice that modules released by Openbravo start by org.openbravo. You should name your modules with a Java package which doesn't start by org.openbravo, but with an identifier of you, your company, or the project you belong to.
- Choose the type (Module, Pack, Template) as described in the Concepts section
- In development is a boolean property to let the system know that you are developing on that module. Only modules in development will be exported by development tools and the System will raise an error if you try to modify some component on a module that is not in development
- Although you might have more than one module in development you can set which one is choosen by default when developing. This is just a way to set a default value for the module when you edit the Application Dictionary
- Some modules will not have UI (eg. a connector to a banking system or a web service) so there is no need to translate them
- If your module is a translation module of another module you have to check this flag to allow users to search for translations. Later in this document there is a full description of how to create a translation module.
- If your module has Chart of accounts you have to check this flag to allow the System to use them during the Initial Client/Organization Setup processes. Later in this document there is a full description of how to add a Chart of Accounts to your module.
- If your module has standard Reference Data you have to check this flag to allow the System to use them during the Initial Client/Organization Setup processes. Later in this document there is a full description of how to add a standard Reference Data to your module.
- You have also to choose the license you are using to distribute your module. Choose one license type from the drop-down list and write the license agreement that will be shown to the user when installing or updating your module. Be aware that Openbravo does not supervise the content of your module nor the license you have choosen. You are responsible to set this information properly
- The author of the module will be shown to the User when browsing the Central Repository and when installing. Also the User will be able to navigate from there to the module url
- If you are working on a new version of your module you can explain what are the changes this new version includes (fixed bugs in minor versions, new features in major ones) in the "Update information" field.
The Include tab is intended only for Packs and Industry Templates. In this tab you include all the modules that are members of the Pack. You can only choose from the ones that you have installed in your instance. You have to provide the Version Number for each of them following Openbravo template as described. In a later section there is a description of how the system manages Version Numbers of Includes (for Packs and Industry Templates) and for Dependencies (for Modules). If you add a module here, when you package your module, this module will be packaged alongside it, in one .obx which will include both modules. This .obx file can then be used to install both modules simoultaneously. As mentioned before, this is the way to include other modules inside a "pack" of modules.
The Dependency tab is intended only for Modules. In this tab you declare all the Modules that your Module depends on. It is of paramount importance that you declare them properly since the system will check that dependencies are met when the User installs or updates your module. It is also important to declare them as soon as you are aware of that because some tools and processes in the development process takes into account dependencies and the result might be wrong if they are not declared when developing your module. You declare dependencies along the modules you have installed in your instance. Typically a module will depend on User Interface Application and in turn, it has a dependency on Openbravo core and eventually in other modules. You have to provide the Version Number for each Module it depends on following Openbravo template. Optionally you can provide a second Version Number (higher than the previous) to express that your Module depends on any Version Number of that module between the two provided. Later in this document there is a complete explanation of Version Numbers and how dependencies and includes are managed.
There is no need you to edit the Translation tab. It is a tool for translators and will be described in the translation section.
If your Module includes a table in the Application Dictionary then you need to register one (or many) data packages in your Module. For a full description on how packages are used look at the DAL developers manual. For each package you have to set the next properties:
- Name, that will be used in the xml entities of tables assigned to it
- Description, used to explain what your package is for
- Java package, that has to match the Java packaging names rules as described in the Java spec. (names and package names). It should be equal to Module package name (if there is only one package) or a subpackage of it.
If your Module includes any database schema object (a table, a stored procedure, etc.) or an AD message then you need to define the DB_Prefix. This is an up to seven characters length string. All your database schema object names need to start with this prefix so it needs to match Oracle and PostgreSql naming requirements (case insensitive and stored in uppercase, alphanumeric characters and start by an alphabetic character). You can only register one DB_Prefix, just Openbravo core Module is allowed to have more than one. DB_Prefix is needed to guarantee that there are no naming clashes when installing modules.
Once you have completed the set up of your Module then you need to register it in the Central Repository. It is needed to ensure that your DB_Prefix and your java package are not already registered by other Modules and it is important to do it even you don't plan to publish your module. More information about this process can be found here.
Once you have completed the registration of your module you are ready to start developing your artifacts!
Naming
It is of paramount importance to use proper names for modules. Especially for Java Package and DB Prefix. This is the only way warranty there will not be conflicts when installing other modules. You can find some naming rules here.
It is a good practice to register the module in Central Repository just after setting these two properties, before starting the development. In this way they will be reserved and in case of another module having registered them, it will not be allowed requiring them to be changed.
Javapackage
Javapackage should be a valid unique Java Package (see above). These are instructions from java.sun.com:
You form a unique package name by first having (or belonging to an organization that has) an Internet domain name, such as sun.com. You then reverse this name, component by component, to obtain, in this example, com.sun, and use this as a prefix for your package names, using a convention developed within your organization to further administer package names.
For example if your company is named Foods & Beverages and you have an Internet domain called fandb.com, all your java packages should start by com.fandb. If you create a CRM module its java package could be com.fandb.crm.
Please take into account that java packages starting by org.openbravo or com.openbravo should only be used by modules distributed by Openbravo.
DB Prefix
It is a good practice to use a short prefix for your company followed by a prefix for your module. Following the previous example all your dbprefixes could start by FB, and the one for the CRM module could be FBCRM.
To determine if your desired DB Prefix is already in use:
- Access the modules list in Openbravo Forge
- Click on the Filters link at the top right of the table of modules
- Make sure that DB Prefix is the selected filter criterion
- Type your desired DB Prefix in the edit box
- Click the Apply button
If no module appears, then your DB Prefix has not been used, and you should register it. If another module has your desired DB Prefix, repeat the last two steps until you have created an unused one that you are happy with.
Usually customization modules are not intended to be published in Central Repository. In this case, DBPrefix should start with CUST. Modules with these kind of DBPrefixes cannot be registered in Central Repository but are collision safe because no other module in Central Repository can use this DBPrefix. This is an important decision to be taken before starting the module development: in case there is any chance of publishing the module at some moment, it should follow the standard rule, if it is absolutely sure that it will not be published you can use CUST and do not register it.
Development of Module artifacts
As stated in the Concepts section there are four types of artifacts: Application Dictionary Components, Software resources, Reference Data and Configuration Script. The requirements of your module and its technical design will define the needed artifacts to build your module. This document explains the details you need to be aware for each type of artifact, one by one, related to modularity. It does not explain how to use them together to build solutions, it is described in the Openbravo Developers Guide. At the end of this document there is an explanation of a number of simple "Hello World" examples that cover all different type of solutions.
Application Dictionary Components (AD components)
Most of AD components can be included in your module but a few exceptions that are explained later in this section. The general rule to describe how Applications Dictionary components are included in your module is simple: set the module field of that component to your module. If you only have one module in development or you are working in your default module it will be done automatically by the system.
An AD component will only be editable when the module it belongs to is in development, or if there is an Industry Template in development in the system. If you change a property in a AD component that is not in development the system will raise an error to avoid you to perform not intended changes.
Translations are managed in a particular way and you don't need to take care about translations when developing. There is a detailed description on the translation process in the Translations section. But remember that your module has a native (base) language so the UI components (Windows, tabs, fields, elements, messages, textInterfaces, etc.) that you develop have to be created in that language.
Access information is not included in modules so you can forget it when developing your module. In a later section it will be explained how to include a particular configuration for openbravo rbac (role based access control).
There are some details on top of the general rule that you should understand to have better control of the content of your module. It is worth to review each type of AD component.
Table and column
Registering tables in the AD is the first exception to the general rule. Tables are not assigned directly to a module but to a data package in a module. It is needed by DAL to properly manage packaging of generated entities and xml naming. Only packages of "in development" modules are available when you edit a table. The module of a table is the module of the package of a table.
Columns are assigned by default to the module of their table. But you might want to add in your module a column within a table in a different module (eg. add a new column to the M_Product table in the core module). To do that you are forced to use a naming rule for that column: its physical name (ColumnName property) has to start by the prefix "EM_XXX_" where "XXX" is your module DB_Prefix (taking into account that the full column name must not be greater than 30 characters). "EM" stands for External Module. The Create Columns from DB process has into account all this rules when importing columns from the database. The same rule is applicable for Name property which is used to generate DAL's properties, therefore must be unique among different modules.
Windows, Tabs and Fields
Windows, Tabs and Fields follow the general rule. The three of them are linked to a module. By default when you add a tab to window it will be linked to the module of its window and when you add a field to a tab it will be linked to the module of its tab. This is true but when the window or tab modules are not in development. Then the defaulted module will be proposed. The Create fields process has into account all this rules when creating fields from table columns.
When editing the field sequence the system will guarantee that you do not change the sequence number of fields that are not in you module, so if you add a new field in a tab of other module the sequence number of the original fields will not be modified. If you edit manually this information be aware that you can not modify information in a module that is not in development. It also applies if you are adding an additional tab to a window in other module.
The tab class and mapping is automatically managed by the system and you not need to take care about it. In a later section it is explained how Class and Mapping are managed and what you can do to add additional entries there.
Reference
There are four types of references: Data type, List validation, Search validation and Table validation. Only List validations and Table validations can be included in a module different to Openbravo core. Data types and Search validations will be supported in modules in future releases (currently it requires to modify Openbravo WAD).
All the values included in a List validation are included in the module where the List validation is defined. You can not add in your module new values to a List validation in a different module nor modify the values included in it.
Report and Process
Reports and Processes follow the general rule. You can declare a new process or report in your module by just creating a new entry in the Report and Process window and linking that entry to your module. All parameters in a Report or Process will be included in the module where the Report or Process is declared.
For manual report and processes it is necessary to define the process mapping, this mapping can be anything within the module's package, for example /org.mycompany.mymodule.report/MyReport.html.
Form
Forms follow the general rule too. You can declare a new form in your module by just creating a new entry in the Form window and linking that entry to your module.
For forms it is necessary to define the form mapping, this mapping can be anything within the module's package, for example /org.mycompany.mymodule.form/MyForm.html.
Message
Messages follow the general rule but with an additional detail you need to take care. You can declare a new message in your module by just creating a new entry in the Message window and linking that entry to your module, and the search key of the message has to start by your module db prefix (to avoid clashes between messages from different modules). It means that you can not include in your module a message with a numeric search key to be raised by a pl/sql object through the RAISE_APPLICATION_ERROR function. You can find more about messages in Openbravo here.
Text interfaces
Text interfaces window usually is not edited manually but entries are automatically generated by the translation process when it parses files to be translated. This process takes into account the packaging of the file being translated and the text interface entry is properly assigned to the module. This process should be transparent for developers but you can browse the entries that your manual developments have created and edit them.
There is a detailed description on the translation process in the Translations section.
Element
Elements are usually automatically generated by the Synchronize terminology process when you create new columns. This process takes into account the name of the columns that you have included in your module and searchs in your module and the modules your module depends on for an element with that column name. If it is found your column will be linked to that element, if not a new element will be created in your module. This process should be transparent for developers but you can browse the elements included in your module and edit them.
Field category, Auxiliar input, Callouts and Validations
These four Application Dictionary components follow the general rule too. You can declare a new component of them in your module by just creating a new entry in the proper window and linking that entry to your module.
Auxiliar input name must start with the module's DBPrefix.
Model - Implementation mapping
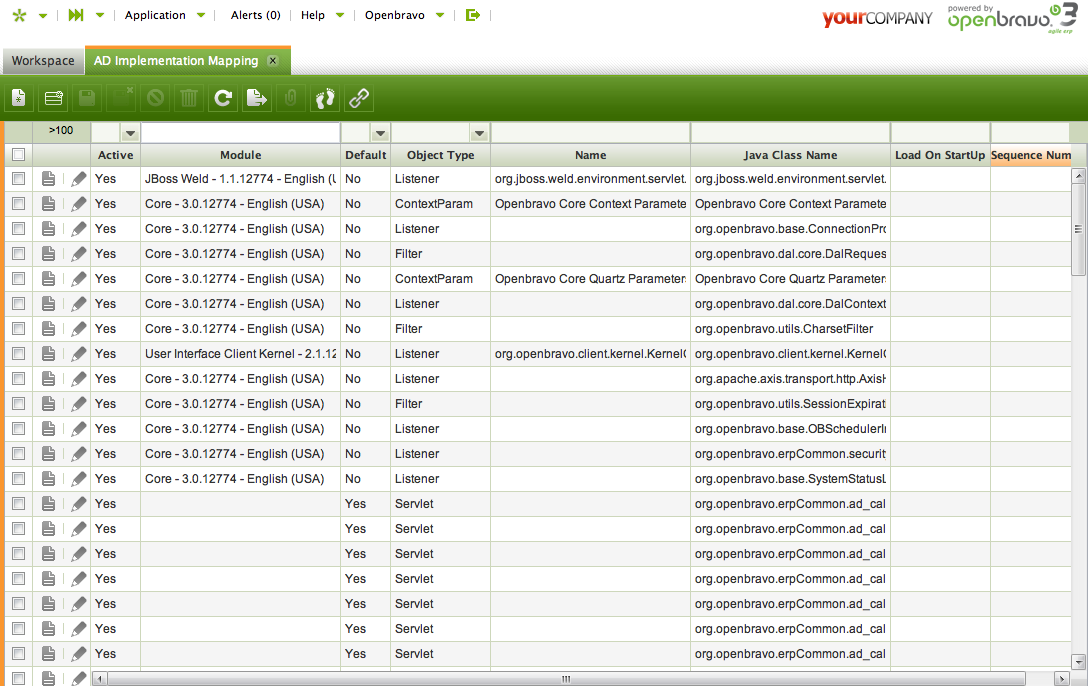
Model - Implementation mapping is generalization of the Model-Object concept that was present in previous releases. You can see a detailed description in the explanation of the Model - Implementation concept.
Through this new window you can include in your module the entries you need to add to the web.xml file of Openbravo context.
Model - Implementation mappings follow the general rule. You can declare a new entry in your module by just creating a new record in the Model - Implementation mapping window and linking that entry to your module. All mappings and parameters assigned to it will be included in the module where the Model - Implementation mapping is declared.
Software Resources
To develop your module you may require to include some software resources. Software resources are Openbravo ERP components not expressed as metadata such as xml definition of database schema object, java classes, jar libraries, XML files, etc. All you need to add to your module has to be packaged within openbravoMainFolder/modules/yourModuleJavaName (eg. for the module org.openbravo.examples.helloworld the packaging is /home/user/src/openbravo/modules/org.openbravo.examples.helloworld in a linux box or c:\openbravo\modules\org.openbravo.examples.helloworld in a windows one). Within this folder you have the standard openbravo folders to hold your software resources (src, src-db, lib, etc). See the image in the packaging section for details.
The build process of Openbravo takes into account the source code structure that is split into modules. Be aware that this concept is completely different from the srcClient that Openbravo used in previous releases: you are not allowed to physically overwrite a file in Openbravo core distribution. In fact, the packaging of your software resources should be located in com.yourCompany.xxx or org.yourCompany.xxx so you will not use org.openbravo.xxx to package your code any more.
Similarly to AD components, although this general rule for packaging is applied to all software resources there are some details for each type of software resource (Database schema objects, java classes, jar libraries, web static content, etc.) that you need to be aware when developing your module.
Database schema objects
The typical flow to add a new database schema object (table, column, constraint, index, trigger, view, stored procedure, function) or modify it in Openbravo ERP is as it follows:
- a developer uses her/his preferred tool as database client for development in Oracle or PostgreSql
- using sql scripts or GUI tools she/he creates or modifies the database schema object in the database following Openbravo standards.
- if the database schema object is mapped with any Application dictionary (Tables&Columns, Reports&Processes) then the developer import the new db schema object from the database to the Application Dictionary. This process adds some new lines in AD tables. After that the developer usually adjusts the imported information -eg. running the synchronize terminology process- and complete AD information to fully describe the solution she/he targets. It might require as well to create some Openbravo code (java files, xsql files, etc.) to complete the solution
- once the solution is fully described the developer builds the system to test that it is working as desired
- the last process is to export the database to xml files through DBSourceManager. This tool export every database schema object to a xml file that uses a common syntax for both Oracle and PostgreSql so you can have different development environments commiting to the same line of code. Application Dictionary data is also exported in this process. So there are two different types of xml files exported by DBSourceManager: model (db schema objects) and sourcedata (Application Dictionary metadata).
From a modularity perspective there is no need you to do any additional task to take care of Application Dictionary metadata since it is managed by the system as described in the previous Application Dictionary Components section. But to avoid naming clashes in the database and to allow DBSourceManager to know the module of not mapped database schema objects it is required to follow the next naming rule for database schema objects:
- All main objects (tables, triggers, views, functions, stored procedures) have to start by your module db_prefix followed by an underscore ("_") symbol (eg. MYMOD_MYTABLE, MYMOD_MYPROCEDURE, etc.).
- Every object (tables, constraints, indexes, functions, triggers) needs to have a unique name in the database. To avoid any kind of duplication, constraint and index names in particular need to start with their table name. This ensures that there will be no name duplication in the whole database.
- Subparts of main objects (columns, constraints, indexes) are supposed to belong to the module of the main part except if their name starts by "EM_" + db_prefix + "_" (eg. EM_MYMOD_MYCOLUMN, EM_MYMOD_MYCONSTRAINT, etc.). EM stands for External Module. So you can use standard column names in your tables (eg. C_BPARTNER_ID, M_PRODUCT_ID, NAME, etc.) but if you want to add in your module a "part" (column, constraint, index) to a table in another module you need to use the prefix "EM_" + db_prefix + "_" for the name of that part. In any case, constraints and indexes in the same module and their table must start with the module's db_prefix, this is in this way because their name must be unique in the whole database.
And that's all. Following this simple rule you can include in your module as many database schema objects as you want. But be aware that you can not modify database schema objects in other modules as it would break the main rule: "a module can not modify components in other modules".
When DBSourceManager exports the database it will only take into account modules "in development", the other ones will not be exported. The exported xml files will be located within the src-db/database folder within the module folder. Look at packaging to see an example.
At the end of this document there are some examples explained that show how to include in your module any type of database schema object. You can use them as a reference to develop your module.
Exceptions
It is possible to define database schema objects within a module that do not follow the naming rules explained in the section above. This is specially useful in order to move to modules existent Openbravo ERP instances in older versions. It is important to note that this feature should not be used for new developments in general. If a module contains a naming exception, it will not be possible to publish it to the Central Repository, because it would not be possible to guarantee that the object defined as a naming exception would not collide with another object defined in a different module.
When a database schema object is defined as an exception for a module it is exported to that module instead to the one that should be according to its name and the naming rules.
Exceptions are defined in Application Dictionary || Module || Module >> Naming Exceptions tab which contains two fields:
- DB Object Type: Defines the database object type (table, function, index...)
- Object name: It is the database object name. Note that it is the name in database, not in Application Dictionary.
Extension Points
Extension Points allow the developer to attach execution code to predefined specific points inside Openbravo PL/SQL functions. This functionality can be used to extend the functionality of some Core functions, without overwriting them in any way. This way of extending the functionality fits very well with Modularity, as it allows extension but also keeps maintainability and upgradeability.
More about Extension Points can be found here and here.
Java classes, other Openbravo MVC objects and jar libraries
Java classes, other Openbravo MVC objects (html, xml and xsql files) and jar libraries follow the general rule to add software resources in your module. You have to package this code within the src folder located in your module folder.
When Openbravo ERP builds the system it will dynamically add to its java project all the src folders within all installed modules as java resources of the project. It uses an intermediate location, build folder, to generate code from xsql files and to compile all java resources and put them together. You can include in your module jar libraries made by you or by any other third party and use them along your code. All jar libraries included in the lib\runtime folder inside your module, are added to the classpath at compilation time and finally deployed to the openbravo context.
When working with Eclipse, if modules are added manually to the workspace (ie. not through the Module Management Console), the module src/ folder needs to be added to the build path manually.
After the generation of code and compile process the build process deploys all the content to the openbravo context in the servlet container. There are two modes of deployment -class and war- that are explained later in the Advanced Concepts section.
Web Static content (css files, images, javaScript)
If you need to add some web Static content (css, images and javaScript) to your module you have to place these resources in the web folder of your module, within a folder named as the java package of your module to avoid clashes of files when deploying resources from different modules.
When the system is built all files in the web folder of your module are copied to WebContent and from there it is deployed to openbravo context in a standard way so this resources can be accessed from the pages in your module by referencing them. Take into account that xmlEngine performs an automatic translation of urls through a replace of "../../../../../web" (replaceWhat parameter) by "@actual_url_context@/web" (replacWith parameter), being "@actual_url_context@" the absolute path to your openbravo context (eg. http://localhost:8880/openbravo).
The Solitaire module is designed to demonstrate how to include typical web static content in your module. Through this example it is simple to understand how it works. For example, this is a snippet of Solitaire.html to reference to solitaire.js file that is located within the web/org.openbravo.examples.solitaire folder of Solitaire module:
<script language="JavaScript" src="../../../../../web/org.openbravo.examples.solitaire/solitaire.js" type="text/javascript"></script>
At execution time, once openbravo context is deployed and loaded you can get solitaire.js javascript library from @actual_url_context@/web/org.openbravo.examples.solitaire/solitaire.js. When the main page of Solitaire module is delivered, xmlEngine will replace "../../../../../web" by "@actual_url_context@/web" and by so properly referencing to the available resource.
Of course you can also reference to other web static content resources included in core or other modules. In that case remember to explicitily declare the dependency to that module.
Config files
You might also need to include some configuration files in the config folder of your module. These files will be copied to WebContent/WEB-INF when the system is built and deployed to openbravo context.
For example, in HelloWorldService module there is file named org.openbravo.examples.webservice-provider-config.xml within the config folder. This file is copied to openbravo context and by this mean the class that implements the webservice is declared.
To avoid clashing of files deployed by different modules files within config-folder should be prefixed with the PackageName of the module.
Reference Data
Openbravo Modularity supports Reference Data: business information referred by transactions and that tend not to change frequently such as translations, charts of accounts, tax codes, banks, product categories, etc. They can be defined at system, client or organization level and it will define when they are loaded into the instance: System information will be loaded at intallation time while Client and Organization information will be loaded during the "Initial Client/Organization Setup" or "Enterprise module management" processes.
Reference data modules are also versioned and can publish updates and upgrades during their life cycle.
There are three types of reference data supported: Translations, Chart of Accounts and standard Reference Data.
Translations
Translation modules are a special kind of module. They have to be marked as "Is translation module" in the Module window. No other contents than translations are allowed in translation modules, and only translations for one module to only one language, the native language declared for the module (eg. translation for core module to Spanish, translation for HR module to French) . Translation modules only depend on the module they translate.
Create a translation module is a straightforward process. First you have to create your module as usual. Remember to define it as "translation module" and define the its native language as the language you are going to translate to, and to use the native language of the module writing its name, description, etc. Keep unchecked the other properties related to reference data (Translation required, Has chart of accounts and Has reference data). This module does not need any Includes, Data packages and DB prefix and will only depend on the module version you are translating.
Then create the main folder of your module -named as its javapackage- within modules folder, you can do it manually or just by executing export.database Ant task (remember that the module has to be In development).
Then all you have to do is install the module you plan to translate and declare the dependency of your translation module to this module, and follow the standard translation process following this document. The export languages process splits the xml files in different folders for each module installed: core is exported directly to the language folder (eg. es_ES) and any other installed module will be exported to a folder named with module package name within the language folder (eg. es_ES/org.openbravo.examples.helloworld). Once you have completed the translation you have to copy the translated xml files of the translated module -only these ones- to referencedata/translation folder within your module folder, and package it as usual by executing the ant task package.module -Dmodule="yourModuleJavaPackage" that will create an .obx file that is ready to be published or distributed.
Translation information is always at System level. When a translation module is installed the process takes care of all details to import a transalation pack: it will mark the Language as System Language if it was not and will load all translations in Openbravo Application Dictionary.
Chart of Accounts (CoA)
Tipically you should add just one Chart of Account in your module, although you can create as many modules including CoA as you want and then put them together in a pack if needed. Chart of Accounts are stored in a particular .csv file, please read this explanation to learn more about how to create a .csv file for a Chart of Accounts and test it is ok.
It is easy to create a module including a Chart of Accounts once you have prepared the .csv file. All you need to do is create a new module and mark as checked the Has a chart of Accounts property. Keep unchecked the other properties related to reference data (Translation required, Is translation module and Has reference data). This module does not need any Includes, Data packages and DB prefix and will only depend on the core version you are using (the structure of the .csv file is defined in core).
Then create the main folder of your module -named as its javapackage- within modules folder, you can do it manually or just by executing export.database -Dmodule=yourModuleJavaPackage ant task (remember that the module has to be In development). Withing the main folder you have to create the subfolder referencedata (all in lower case) and within it the folder accounts and place your .csv file there. Remember that folders are case sensitive so the folder must be identically named and use the correct capitalization.
Now your module is ready to be packaged. Execute the ant task package.module -Dmodule="yourModuleJavaPackage" and it will create an .obx file that is ready to be published or distributed.
Chart of Accounts are always at Client/Organization level so nothing happens when you install this type of modules but just that the chart of accounts is available to be applied to new clients (during Initial Organization Setup), new organizations (during Initial Organization Setup) or to existing Client/Organizations (by Enterprise Module management).
Standard Reference Data
You can also include any other data in your module through standard reference data using data sets.
First you need to create in your instance the data you want to include. It could be taxes for a particular country, product categories or a collection of alerts for a particular industry or any other data. You can combine different data from different tables in your module.
After that, the next step is to create a module and mark as checked the Has reference data property. Keep unchecked the other properties related to reference data (Translation required, Is translation module and Has chart of accounts). Complete the Reference data description with information about the data you are including (this description might be different from the module descriptions since the module might include some other content). This module does not need any Includes, Data packages and DB prefix and will depend on the module versions that define the data structure you aim to include (eg. if your data comes from table defined in core 2.50.1234 then it will only depend on this module-version).
Then you have to create within your module as many data sets as you need to define your data. A data set is a collection of data defined by the tables where those data are stored, the rows included -defined through a filter clause for each table- and the columns you want to include for each table. Data sets support advanced data definition to include full business objects (eg. when including an invoice you might ask the system to include all its members -lines, taxes, etc.- as well). Click here for a general description of datasets.
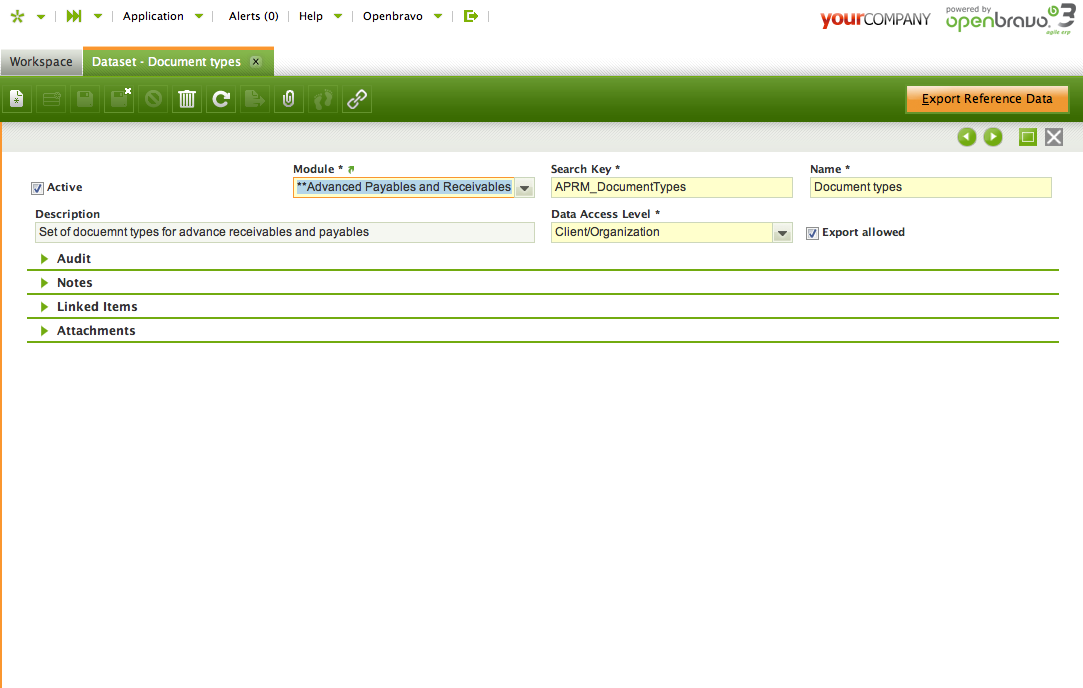
You can create datasets in the Data Set Window within the Application Dictionary menu folder.
There are some details you need to be aware when creating data sets:
- Of course the data set should be assigned to your module in which you will distribute those data
- Data access level is related to data access level in AD tables, read here for more details. It defines the level at those data will be imported -of course it will be restricted to the levels allowed by the table where data is stored- and when data is imported in the instance that installs the module:
- System only: it will be imported at System level at installation time. Only tables with System only, System/client and All data access level are allowed in System only data sets (eg. Roles, Alert rules, etc.)
- System/client: it will be imported at Client level during "Initial Client Setup" or "Enterprise module management" processes. Only tables with System/client, Client/Organization and All data access level are allowed in System/client data sets (eg. Roles, Product categories, etc.)
- Client/organization: it will be imported at Client or Organization level during "Initial Client Setup", "Initial Organization Setup" or "Enterprise module management" processes. Only tables with Client/Organization and Organization data access level are allowed in Client/Organization data sets (eg. Product categories, Business partners, etc.)
- Organization: it will be imported at Organization level during "Initial Organization Setup" or "Enterprise module management" processes. Only tables with Client/Organization, Organization and All data access level are allowed in Organization data sets (eg. Business partners, Sales orders, etc.)
- Check the Export allowed field to show the Export Reference Data button. From this button you will be able to export your data to xml files and this way include them in your .obx file
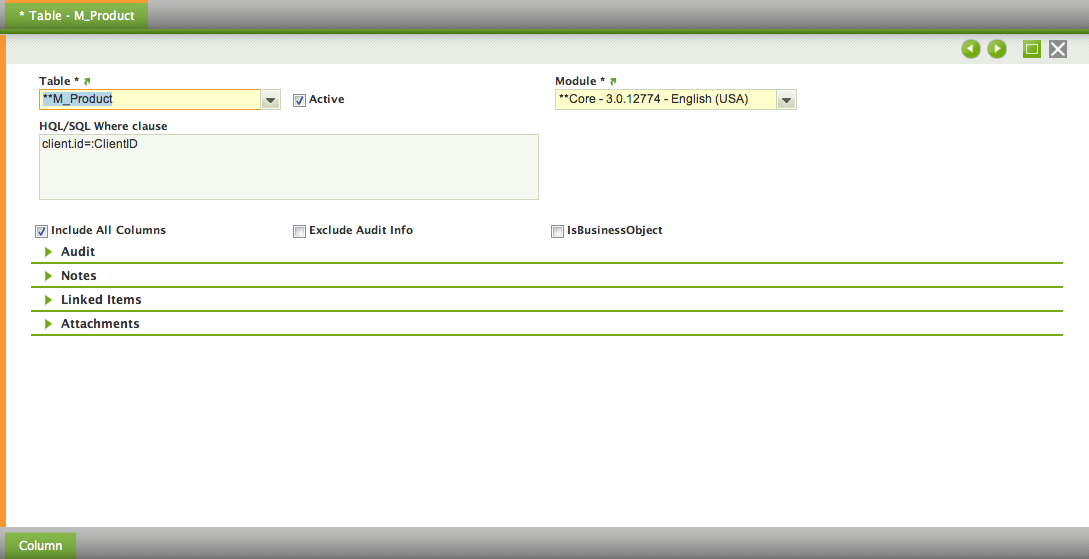
Next step is to define the collection of tables included in your data set.
Again some details you need to be aware:
- You can add as many tables as you need in your data set
- For each table you can add a SQL where clause to filter data in the table. In the example above it is filtering by Product categories in a particular client. Click here for more information on the DatasetTable where clauses.
- You can include all columns in the table or declare one by one the ones you want to include
- Tipically you will not want to include audit info in your data, you can exclude audit info columns
- By default your data set includes just the records in the data set tables matching the SQL where clause criteria. But you can define the table in your data set as "Is business object". If you do it then the system will export not only the records in the table matching you SQL where clause but recursively any other record in the system that has a foreing key to these records and that is defined as member of the referenced record (business object) through the "Is parent" attribute in AD column.
Take into account that the system will export not only the data defined by you data set but also any information referenced by it. This way it is guaranteed that the system will be able to import that data in any other instance although the referenced data does not exist there. If it is the case the import process will also import any referenced data needed to complete the operation.
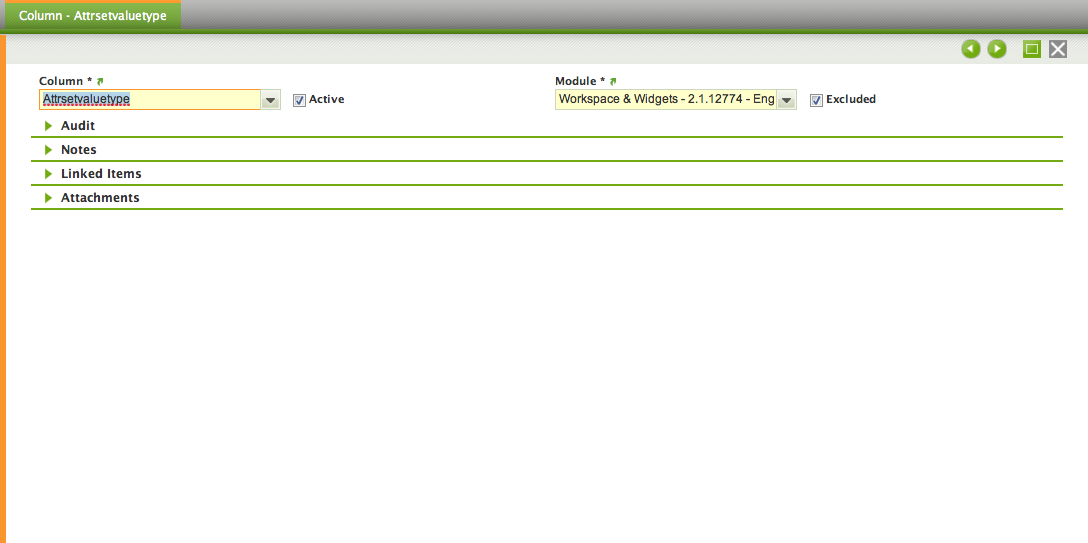
Now you have to define the columns included for each table.
Usually there is no need to define columns in your table since tipically you want to include all of them but audit info and you can do it in the table itself as described before. Some times you might want to exclude some other columns by checking the Excluded field.
Once you have completed the definition of all your data sets you have to export them to xml files so they are included in your .obx file when packaging your module. To do that you have to click on the Export Reference Data button in the data set header. It will create a xml file named as the data set in referencedata/standard subfolder within your module folder. Of course you can run this process as many times as you need to fine tune your data. Finally package it as usual by executing the ant task package.module -Dmodule="yourModuleJavaPackage" that will create an .obx file that is ready to be published or distributed.
As described before you can also publish new versions of your reference data modules. Take into account that to ensure data consistency reference data is not deleted from the instance when applying an update/upgrade where the new data set does not include some records originally included. So instead of remove them from the data set you should inactivate them.
Advanced topics
There are special cases that must be taken into account when including tables and columns to reference data.
All columns in dataset are always reset, when updating reference data
In case you are developing a module that contains a dataset at a System/client, Client/Organization or Organization data access level (actually all the possible ones, in except of System only), you must take into account that every time the user updates the reference data application (through Enterprise Module Management window) all the included columns will be updated. This is useful, but also little bit dangerous:
Imagine that you need to add records belonging to AD_Sequence table in a dataset, and you include all columns of the table in the dataset.
The sequences are used, for example, by the documents. Every document has got a sequence associated to it. Every time a new invoice is created and saved, the sequence provides a new number (stored in the CurrentNext column), and increments its value for the next time a new number is requested.
The user applies the dataset, and everything goes fine: sequences are imported to database (with let's say, CurrentNext='1000000'). User starts to use the sequence, so CurrentNext value is incremented (let's say that now CurrentNext='1000123'). Now a new version of the dataset is published because, for example, some more sequences are included to it. User updates the module, and updates dataset in Enterprise Module Management window. In that action, the CurrentNext value of the original sequence is reset from '100123' to '1000000' again.
What can be done in order to avoid this kind of issues? Just don't include that value in the dataset, and set it through the default value of the column.
Module Scripts and Build Validations
It is possible that your module needs to check if the system complies with some specific rule before installing it. If this is the case, a Build Validation can be used to verify it. A Build Validation is basically a process, defined as a Java class, which can connect to the database and to the Openbravo sources, check whatever the developer wants, and finally return a result of the validation. If the result is not positive, the module is not applied in the system.
Also, it is possible that your module needs to do specific transformations to the system while installing. This changes can be of basically any kind, such as modifying some data in the system, or adding some database object which uses some Oracle or PostgreSQL specific syntax which makes it not possible to add it through our standard dbsourcemanager+xml files. For this, you can use Module Scripts, which like Build Validations, are defined as a Java class which can connect to the database, and do any kind of modifications to client data.
If you want to know more about how to create Build Validations and Module Scripts, you can check this link. If you plan to use a module script to create a database object which uses some kind of database specific syntax or feature, you should exclude it from the dbsourcemanager standard model. To learn how to do this, read this document
Configuration Script
Up to know we have seen how to extend Openbravo through modules. As you remember modules are able to add new artifacts -application dictionary components, software resources and reference data- but are not allowed to modify other modueles to avoid crossed dependencies between them.
But there is a special type of modules -Industry Templates- that can include changes to other modules within it. It is done through configuration scripts. A configuration script is a collection of changes that your Industry Template does in other modules included in the Industry Template.
Create a configuration script is straightforward. You don't need to manually edit it but the system will generate it automatically as you go. You only need to create an Industry Template in your instance. You can only have one Industry Template "in development" at a time and any change you do will be included in the configuration script of that Industry Template.
If you want to know more about how to create Industry Templates and configuration scripts, you can check out this document.
Development tasks
Read this document to get a complete explanation of all available development tasks.
Publish the .obx file of a Module
Once you have finished developing your .obx file, you can publish it to the central repository.
- If you haven't exported your module yet, do
ant export.database
- Package your module using the following ant command, where yourModuleJavaPackage is the java package you defined in your module:
ant package.module -Dmodule=yourModulePackage
- Follow the steps defined in Publish Version document.
Advanced concepts
This section explains in detail some advanced concepts of Openbravo Modularity. It is not strictly necessary you to read all these details but it is worth to do it, it will help to avoid mistakes when creating your modules.
Version numbers and how dependencies and includes are managed
Different releases of an Openbravo module are identified with a version number. An Openbravo Version Number is an string up to 10 characters lenght following the format x.y.z where:
- x is a number indicating module generation (eg. very relevant changes in functionality, user interface or technology)
- y is a number indicating major release (eg. new features available in a regular basis)
- z is a number indicating minor release. Minor releases should not add any new functionality but just fix bugs within its major release with the objective of increasing stability
A major release is identified by the two first digits (x and y). For example, core 3.0.13642 and core 3.0.13921 are two different minor versions within the core 3.0 major version.
Modules have to declare any dependencies between them and all of them must depend finally on core module. Dependencies are declared to a particular major version of a module or a range of major versions, starting from a concrete minor version. For example, module A depends on core 2.50 or module B depends on any version of module A from version 1.0 to version 1.6. In a similar way Packs and Industry Templates declare the modules (including other packs and Industry Templates) that are included within them. In this case ranges are not supported, just a major version of a module can be included in a Pack/Industry Template. Be aware that both dependencies and includes use a full version number (x.y.z) to identify the version, minor version is taken into account to define the starting version of the dependency, but it is not for the to version field. In this case, the minor version (.z) is used just for keeping track of the actual release that was used when the module was developed.
Usually a major release matures in a process through three phases of increasing stability: alpha, beta and production. Many minor versions can be published in each phase but the release can not be considered stable enough to build something on top of it till the beta phase is reached. You should not develop a module that depends on an alpha version of other module to avoid instabilities inherent to this stage.
To improve maintainability minor versions of modules are not taken into account when managing dependencies. It means that in the previous example module A should be compatible with any minor version of core 2.50 (it is a good idea to specify also the minor version the module was developed in, to avoid the need to test it in earlier minor versions). It causes some limitations on what developers can do when working on a minor version but highly improves maintainability by minimizing the effort of checking dependencies. You only need to review if your module remains compatible with a module it depends on when a major version of that module is released.
To enforce this behavior it is of paramount importance to clearly state what changes are forbidden within a minor version and to enforce them before publishing. The general rule is that the public API of the module should not change, and it can be expressed in more detail with the following set of not allowed changes within a minor version:
- Data model
- Add a mandatory column in a table without a default or oncreatedefault. New not-nullable columns are allowed only if they have a corresponding default or oncreatedefault value, which can be applied to existing records without this column. You can find more information about oncreatedefaults here
- Change the datatype or reduce length/precision in a column
- Remove a column
- Renaming a column: it is equivalent to remove and create that column
- Add a new constraint to a table that was not previously enforced by the application. Constraints to avoid wrong behavior are allowed but should be warned.
- Business logic
- Changes in the signature of public methods/procedures/webServices: method name, number and type of parameters, return type and thrown exceptions
- Changes on expected functional behavior (eg. meaning of a particular column/attribute, etc.)
- Navigation
- Changes in the URL's for direct navigation to web components (windows, reports, etc.)
These restrictions make the fixing bugs exercise more difficult but are a key factor to create a maintainable ecosystem. They should be guaranteed during the beta and production phase of any release of any module. During the alpha phase -when bug fixing activity is high- you could break this rule to get some flexibility and taking into account that there should not be any other module depending on it.
Dependency types
Dependency type is defined by the Dependency Enforcement field, the possible values it can take are:
- Major Version: This is the default enforcement and works as described above.
- First Version is the first minor version the dependency is compatible with. So if first version is 1.1.5, it will be compatible with all the 1.1.x minor versions starting from 1.1.5, but not with any other major version such as 1.2.0, unless Last Version is defined.
- In case Last Version is defined, it is only taken into account if it is a different major version than the first version, in this case it defines the latest compatible major version, but its minor version is not taken into account. For example if the dependency is defined from 1.1.5 to 1.3.6, the module will be compatible with all 1.1.x starting from 1.1.5, with any 1.2.y version and with any 1.3.z (including minor versions of 1.3 higher than 1.3.6).
- If Last Version is blank or it is within the same major version First Version is in, the compatibility is defined for all versions in the same major version First Version is in starting from the minor version First Version defines.
- Minor Version: In case both First Version and Last Version are defined, the compatibility is from the minor version in First Version to the minor version in Last Version (even they belong to the same major version). If Last Version is blank, the only compatible version will be the one defined by the First Version.
- None: There is no restriction between major versions, First Version defines the first compatible minor version and the compatibility is for all versions higher than this one including major versions. This type should normally not be used.
User Editable Enforcement
Module owner can define whether the enforcement is overwriteable by user. By default it is not.
In case it is possible to overwrite the module dependency's enforcement, user will be able to set a different enforcement for this dependency in his instance being this value the used to calculate dependencies.
Users can select the enforcement for User Editable Enforcement dependencies from the Settings tab in Module Management window.
Model - Implementation concept
AD_Model_Object is a table in Openbravo Application Dictionary to link Application Dictionary components and the class (servlet) that implement that object. So this table is a mapping between the logical side (AD components) and the physical side (classes). It is useful for two main reasons:
- It allows to implement in a generic way rules that apply to all AD components like security, navigation and others.
- It is the mechanism to automatically populate the web.xml file where classes (servlets) are declared. The AD_Model_Object_Mapping is an utility to create the mapping entries in the web.xml file.
There is a few number of exceptions to this description: some servlets that are deployed in Openbravo context but are not linked to any AD component, such us the DataGrid or the AuditInfo servlets. They are invoked from manual or standard components (windows, forms, etc.) through http requests by hardcoding its url-mapping in the request. It can be interpreted still as a mapping of actual classes that implement a functionality that is not described in current Openbravo model, although it may be in the future.
By using modules, the deployment of any type of optional content in an Openbravo instance, including additional entries in the web.xml file of openbravo context, is allowed. This is done through the AD_Model_Object table. Developers can create entries in this window not linked to any AD component. To support any type of web.xml content (servlet, listeners, filters, etc.) a new column is added to the AD_Model_Object to represent the type of web.xml entry that the developer is adding. They can also declare a set of mappings for the entry and a set of parameters if needed.
The module of a AD_Model_Object entry is calculated with the following rule: if it is linked to any AD component then the module is the one assigned to that AD component, otherwise the module is the one assigned to the AD_Model_Object record itself.
With this extension the web.xml file in the openbravo context is extensible through modules.
More information about the Openbravo model object mapping can be found here.
Example on how to create and package your module
Now it is time to go practice. You can follow this howto that will guide you step by step on how to create and package your first module.
